$2.04 each
Available on Order
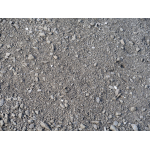
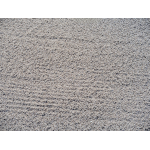
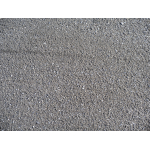
Please note Whilst all care has been taken to provide you with a good indication of colour, you should always sight product samples before use, due to natural variations in Colours & Sizes. Products may vary from image provided.
Streetpave clever spacer lugs, incredibly accurate face dimensions and finely finished, deep bevels, represent the pinnacle of design for contemporary, stylish and durable driveways.
| Weight | 4.25 kg |
|---|---|
| Dimensions | 230 × 112 × 80 mm |
| Free Delivery | 3 full pallets and over (Conditions Apply) |
| Price per m2 | $81.60 |
| Qty per m2 | |
| Qty per pallet | |
| Application |
Basic guide to laying pavers
Prepare the site
Place screed rails on road base and spread bedding Sand roughly between and over the rails – keep the rails.
The easiest way to screed Sand is to use two guides (screed rails) and a screeding board (e.g. a flat piece of timber). Establish bedding tracks with the screeding board.
Add the bedding Sand
Excavate the area to be paved to allow for the base layer (generally 100 -150mm thick of road base), bedding Sand (generally 30mm thick coarse washed river Sand) and the paver thickness. Establish falls and level using a spirit level on the screed board. Spread the road base to an even thickness and compact using a mechanical plate compactor.
Level the surface
Bed the screed rails into the bedding sand. Drag the screeding board in a sawing motion from side to side across the rails to create a firm, flat laying surface. Remove the rails, fill in the voids with bedding Sand and trowel smooth.
Set the lines
Set string lines at right angles to establish paving lines. These will help keep the joints straight for that truly professional look.
Begin the laying process
Start laying along the longest straight edge of the designated area and lay whole pavers first. Leave 3-5mm between pavers to allow for jointing Sand (unless the pavers have nibs).
Cut Pavers
Cut and position part-pavers if the job requires them. Edge restraints prevent the pavers from moving.
Fill the joints
Sweep jointing Sand over the finished dry paving, ensuring that all joints are full.
Sand filled joints
Pavers 50mm thick or greater surface to be plate compacted. Always remember to use a rubber mat or carpet beneath the plate compactor to prevent damage to the pavers. Pavers 40mm thick or less – surface to be hand compacted with a rubber mallet.
A carefully planned Cleaning & Maintenance program is the best method to keep pavers looking good for years to come.
This is a salty deposit on the surface of pavers which appears as anything from strong, powdery, white blotches through to a fine white haze that can make pavers or blocks look “faded” and is generally the result of a chemical reaction that takes place as concrete cures. Efflorescence may also soak into pavers or blocks from salt deposits in adjacent materials such as bedding sand, joint sand or soil.
Rain will generally dissolve efflorescence and gradually wash it out of the paver or block over time. Stubborn patches may require cleaning with a stiff bristled nylon brush or colourless plastic scouring pad (do not use deeply coloured or metallic brushes or scourers as they will leave marks). It is important to brush away powder residue and then rinse and brush the area thoroughly with clean water after breaking up the efflorescence otherwise it may simply soak back in and re-stain the area again. If stronger methods are required, reputable sealers from manufacturers such as ENVIRONEX and Drytreat and other efflorescence cleaners are available through good Landscape Supply stores.
Soak the area with a domestic bleach or a solution of five parts water with one part pool chlorine. Leave for ten minutes then gently hose down before the solution dries.
For maximum protection, National Masonry™ recommends that all pavers should be sealed with a quality penetrating sealer following installation. Please check with a qualified tradesperson for advice on this process. National Masonry™ does not accept liability for stained or damaged pavers once laid.
WARNING: Hydrochloric acid is NOT recommended for use with concrete pavers as irreparable surface damage may occur.